
目录

- .travis.dSwiftyLinkerKit initial drop8年前
- SourcesMake calls chainable8年前
- .gitignoreSwiftyLinkerKit initial drop8年前
- .travis.ymlSwiftyLinkerKit initial drop8年前
- CONTRIBUTING.mdSwiftyLinkerKit initial drop8年前
- CONTRIBUTORS.txtSwiftyLinkerKit initial drop8年前
- LICENSEInitial commit8年前
- Package.swiftEmbed the clock demo8年前
- README.mdREADME: Add connect to examples8年前
邀请码
版权所有:中国计算机学会技术支持:开源发展技术委员会
京ICP备13000930号-9
京公网安备 11010802032778号
SwiftyLinkerKit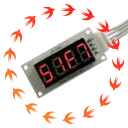
A Swift module to control LinkerKit components in a convenient way. This is currently focused on LinkerKit things attached to a Raspberry Pi LK-Base-RB 2 shield (since this is what I have 🤓).
SwiftyLinkerKit is based on the excellent SwiftyGPIO module, and of course on the great work of the Swift-ARM Community.
Supported Components
Right now SwiftyLinkerKit supports only a few components listed below. It is very easy to add new ones, we very much welcome contributions!
Also: We need help with understanding LK-Accel and LK-Temp (how to connect them, how to hook them up w/ SPI, contact us if you know more about that weird hardware stuff 🤖).
LK-Button 2
Two buttons :-)
LK-Digi
A neat 7-segment display.
LK-PIR
An IR movement detector.
LK-Temp
Temperature sensor, uses a thermistor to detect the environmental temperature. LK-Temp is connected to one of the analog ports (and hosted via the board ADC running on SPI).
How to setup and run
Note: This is for 32-bit, 64-bit doesn’t seem to work yet.
Raspi Docker Setup
You don’t have to, but I recommend running things in a HypriotOS docker container.
Setup is trivial. Grab the flash tool, then insert your empty SD card into your Mac and do:
Boot your Raspi and you should be able to reach it via
zpi3.local.I also recommend to use docker-machine (e.g. see here), but that is not necessary either.
Running an ARM Swift container
Boot the container like so:
You end up in a Swift 4.1 environment with some dev tools like emacs pre-installed. Sudo password for user
swiftisswift.Importing the Swift Package
Sample
Package.swiftfile:Example: Clock
A simple digital clock.
Then edit the
Package.swiftfile to look like this:Edit the
Sources/clock/main.swiftwith the following Swift code. In the example the LK-Digi is connected to the Digital-4/5 slot of the LK-RB-Shield, adjust accordingly.Build everything:
You need to run it using
sudo(password in the Docker isswift):Want to see it in action? SwiftyLinkerKit driven input/output using LinkerKit components
Who
SwiftyLinkerKit is brought to you by AlwaysRightInstitute. We like feedback, GitHub stars, cool contract work, presumably any form of praise you can think of.
There is a channel on the Swift-ARM Slack.