
目录

- LocalizableTestsfixing target test name8年前
- LocalizableUI Example.xcodeprojPrepare release 0.3.88年前
- LocalizableUI ExamplePrepare release 0.3.88年前
- LocalizableUI.xcodeprojfixing target test name8年前
- LocalizableUI.xcworkspacefixing target test name8年前
- LocalizableUIPrepare release 0.3.88年前
- LocalizableUIExampleTestsfixing typo8年前
- LocalizableUIExampleUITestsadding tests8年前
- ScreenShotsadding gif for the doku8年前
- docsadding new jazzy docs8年前
- .gitignoreRestructured project to framework project8年前
- .jazzy.yamladding new jazzy.yaml file8年前
- .swift-versionRestructured project to framework project8年前
- .travis.ymlupdation travis simulator ios version8年前
- LICENSERestructured project to framework project8年前
- LocalizableUI.podspecRelease 0.3.88年前
- Package.swiftAdd package manager support8年前
- README.mdadding new path for image for cocoapods8年前
邀请码
版权所有:中国计算机学会技术支持:开源发展技术委员会
京ICP备13000930号-9
京公网安备 11010802032778号
LocalizableUI
Example
To run the example project, clone the repo, and run
pod installfrom the Example directory first.Supported UIElements
Requirements
Communication
Installation
CocoaPods
LocalizableUI is available through CocoaPods. To install it, simply add the following line to your Podfile:
Carthage
Add
github "weiss19ja/LocalizableUI"to your Cartfile.Swift Package Manager
Usage
Storyboard
The easiest way to use LocalizableUI is the Storyboard. Here you can enter your Localizable.strings Keys.
For the SegmentedControl you can enter an array of Localizable.strings Keys separated by “,”.
The BackButton can be set in the prior ViewController. Here you can use the ViewController fields in the Storyboard.
If you are using an NavigationItem this will override the Title and the BackButton of the ViewController.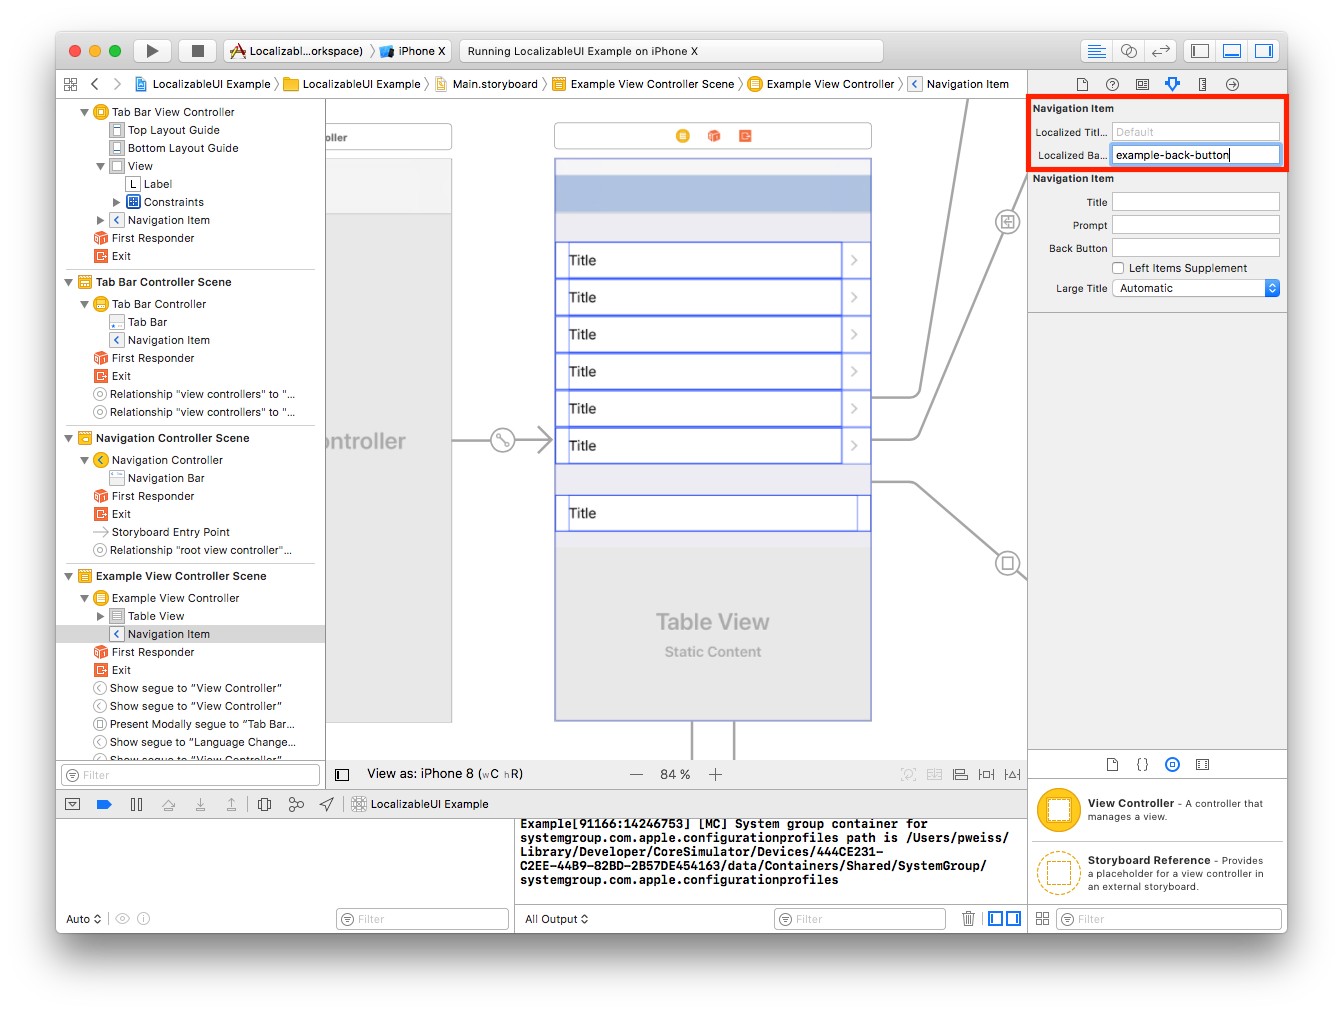
Code
Localization of Views
It is also possible to set the LocalizableKeys in the Code. This includes all features of the Stotyboard LocalizableKeys
AlertViewController
AlertViews must be configured in the code.
LocalizedKey to text
Custom View
To localize any class or struct you can simply implement the Localizable Protocol
Language change manual
You can change the language while the app is active. You simply have to use the LocalizationManager changeLanguage(…) method. All your Views will update without any further adjustments.
Authors
Jan Weiß, Philipp Weiß
License
LocalizableUI is available under the MIT license. See the LICENSE file for more info.